Machine Shinnoki Cleaner While Protecting The Finished Veneer Face.
Shinnoki is a prefinished real wood veneer panel with an MDF core, matching edge solutions, and a surface that is already ready for the project. That makes cut quality, edge control, scoring, handling, and finished-face protection far more important than they are on an unfinished panel.
Finished SurfaceShinnoki arrives brushed, stained, and lacquered, so the face needs to stay clean from the first cut to final handling.
02
Cut CleanlyCompression tooling, high-finish blades, and a properly tuned scoring setup help protect both finished faces of the panel.
03
Handle CarefullyClean tables, carts, rollers, conveyors, and return systems make a major difference with finished veneer products.
04
Think System-WideThe best Shinnoki result comes from matching tooling, machine setup, dust extraction, edge strategy, and material flow together.
Material Handling Mindset
Shinnoki Is Not Raw Veneer. Treat It Like A Finished Component.
Shinnoki panels arrive brushed, stained, and lacquered. The finished face is the value. Cutting, routing, drilling, edging, stacking, and moving the material should all be planned around protecting a surface that is already presentation-ready.
When the panel is already finished, scratches, burnishing, tear-out, or chipped veneer edges become much more expensive. The cleaner the process is upstream, the more reliable the finished part will be downstream.
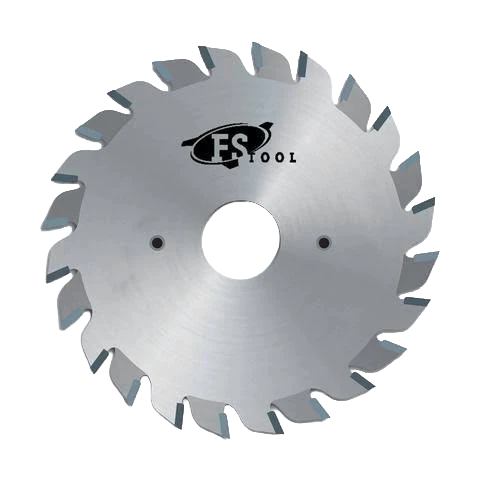
Use this as the preferred outline cutter for Shinnoki panels on a CNC nest when the goal is a stable cut, clean compression geometry, and protected finished faces.
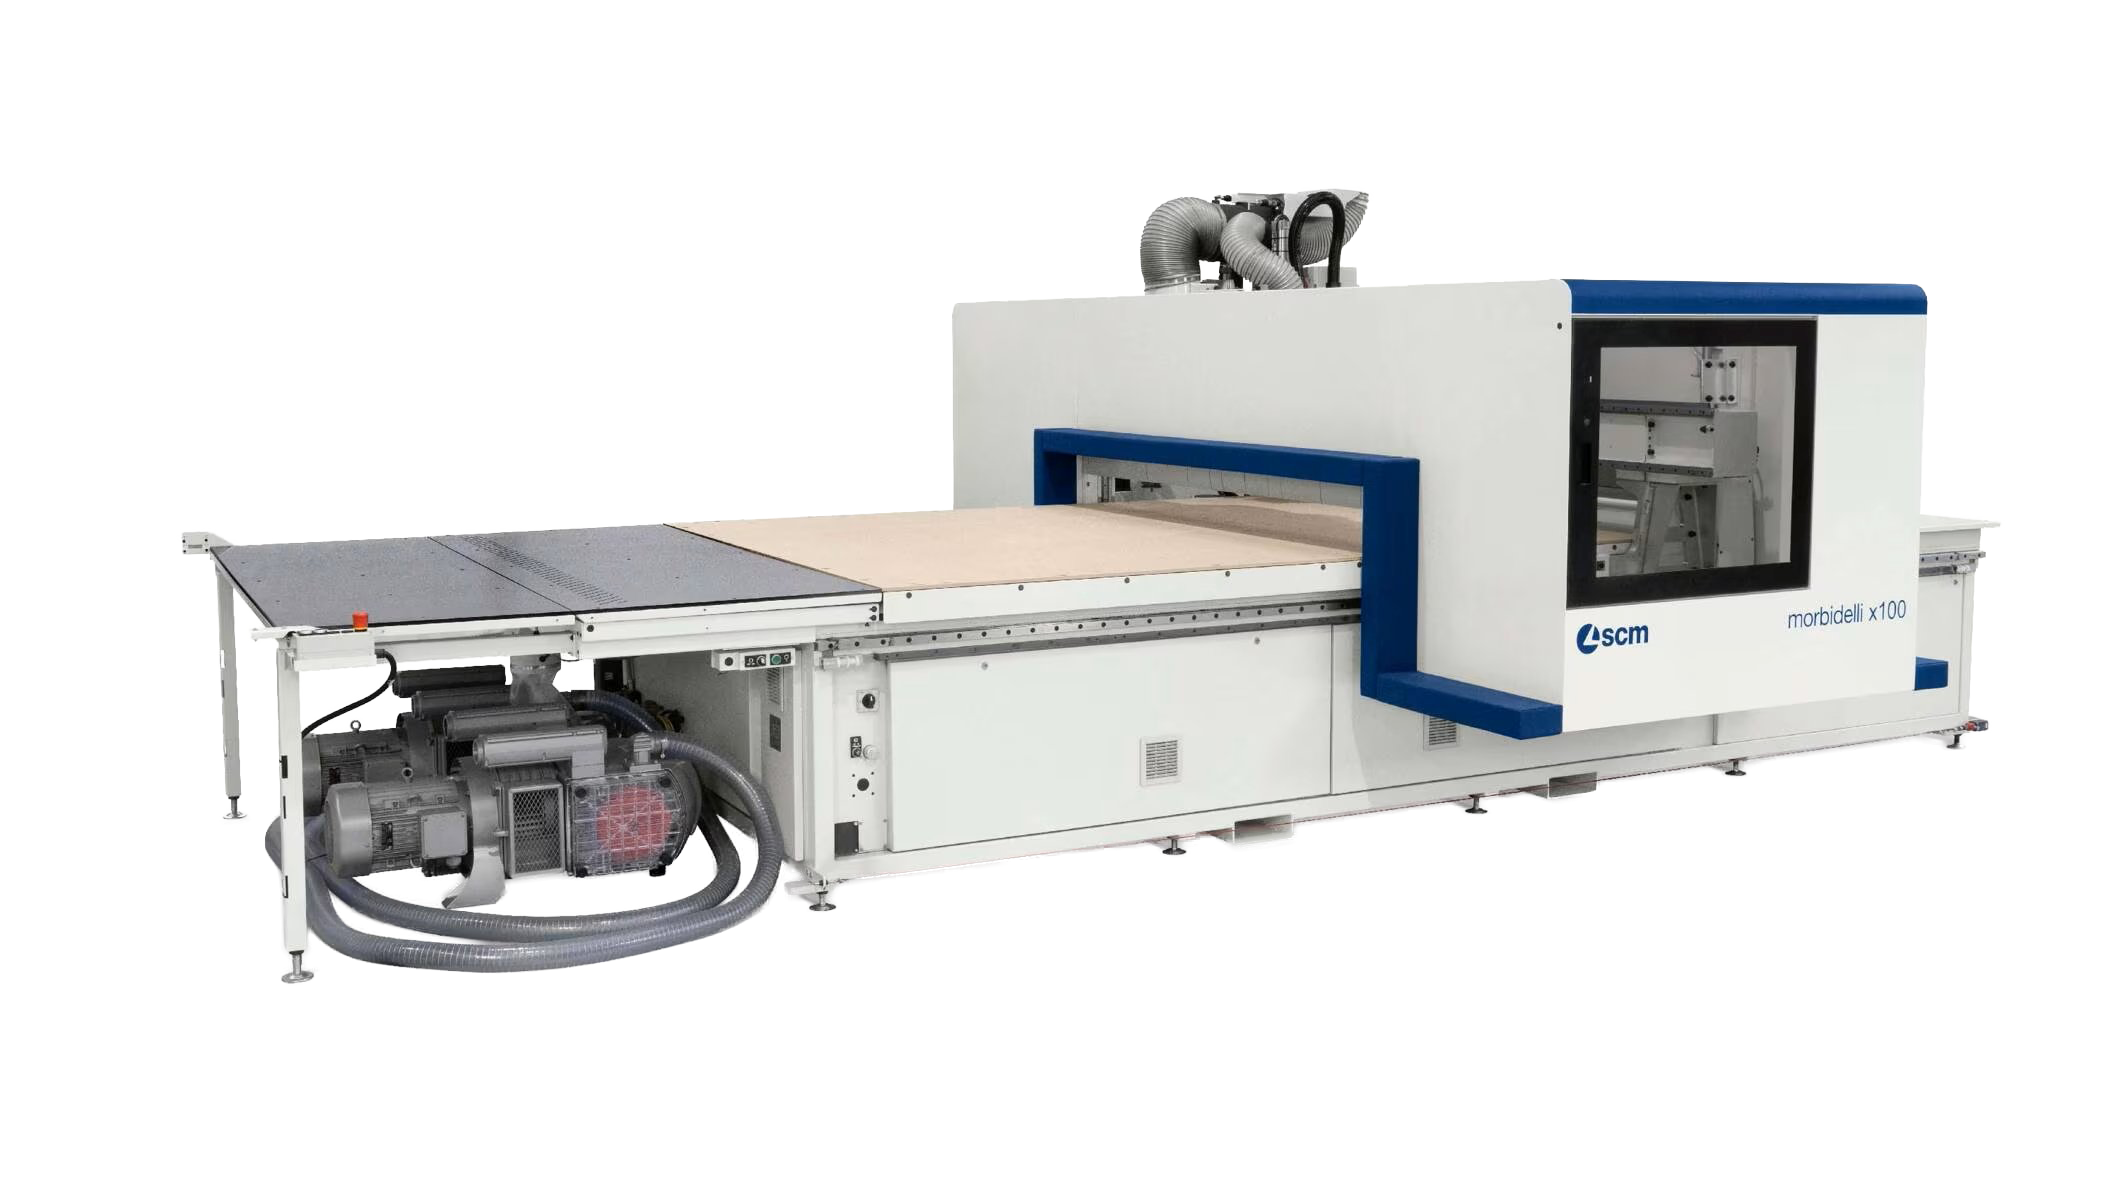
For high-quality Shinnoki processing, a stable CNC nesting platform helps support cleaner routing, better hold-down, and more repeatable finished-part quality.
The Cut Is Only Half The Job. The Finish Has To Survive The Shop.
Clean Shinnoki processing comes from the whole setup working together: sharp tooling, stable feed speed, clean chip evacuation, correct scoring, careful face orientation, protected offloading, matching edge banding, and operators who understand they are handling a finished decorative panel.
Panel ConstructionPrefinished real wood veneer panel with veneer faces over an MDF core. The panel is designed as a ready-to-use decorative surface for interior applications.
Typical Panel SizeCommon technical references list Shinnoki panels at approximately 2790 mm x 1240 mm x 19 mm, roughly 4 ft x 9 ft x 3/4 in.
Core & VeneerTechnical data references an 18 mm MDF board with approximately 0.6 mm real wood veneer before processing. Always confirm the supplied SKU before machining.
Finish SystemShinnoki is brushed, stained, and lacquered. The finish is factory-applied, so cutting and handling should protect the face instead of assuming sanding and refinishing will hide damage.
VersionsExclusive is intended for projects where both sides need Shinnoki-quality veneer. Premium is commonly used when the front face is continuously visible.
Matching EdgesMatching edge banding and veneer laminate options are available, making edge quality and banding selection part of the full Shinnoki processing strategy.
Know The Panel Before You Cut It
Key Shinnoki Panel Specification Notes.
Shinnoki is a premium decorative panel, so machine setup, tooling choice, and handling method should all be selected with the finished face in mind. The better the process fits the panel, the more consistent the visible result will be.
Finished panels leave less room for correction later. A cleaner cut, a better score line, and a more controlled edge strategy save time and help avoid costly rework.
Every machine, tool, blade, and production cell behaves a little differently. The goal is to balance the main variables so the finished veneer stays clean, stable, and presentable through the whole cut.
Preferred CNC CutterUse the GreenCap 1/2 inch MTCE compression cutter as the preferred outline tool for Shinnoki nesting when premium visible-surface quality is the priority.
Saw StrategyFor saw workflows, pair a high-finish main blade with a properly matched scoring blade to control underside breakout on the finished veneer face.
Feed StrategyUse a steady feed rate that cuts cleanly without forcing the veneer. It is always worth validating the edge on offcuts before committing finished panels to full production.
RPM StrategyBalance RPM against feed speed. Too much rubbing can create heat, shorten tool life, and increase the risk of visible edge defects on finished veneer panels.
Hold-DownVacuum strength, spoilboard condition, gasket strategy, and part movement all affect edge quality. Vibration or lift can show immediately on a finished panel.
Face ProtectionKeep tables, rollers, carts, return systems, and stacks clean. Shinnoki should be handled like a finished surface from the moment it is unpacked.
Edgebanding
Shinnoki Edge Options For Finished Panel Workflows.
Shinnoki edge solutions are designed to match the finished panel appearance while supporting furniture and interior component production. The available formats cover real veneer edges, durable ABS edges, and hybrid veneer-plus-ABS constructions.
Summary
Choose The Edge Type That Matches The Performance Requirement.
Shinnoki edge banding is supplied as a ready-to-use, prefinished solution to match the panel surface. Veneer edge banding supports a natural real-wood look, ABS edge banding adds stronger impact resistance, and veneer + ABS combines real-wood appearance with added reinforcement.
Across the range, the products are not pre-glued, are supplied in common heights of 24 mm and 48 mm, and can be applied mechanically with hotmelt systems or manually using suitable adhesives. Storage conditions matter: keep rolls horizontal, protect them from UV and contamination, and maintain stable shop conditions.
Veneer Edge BandingReal wood veneer edge banding gives the most natural finished appearance. It should be coordinated with part direction, cutting sequence, and handling so the edge matches the visible panel face.
ABS Edge BandingABS edge banding adds durability and impact resistance while supporting production-friendly handling. It still needs a clean, square, dust-free edge before application.
Veneer + ABS Edge BandingHybrid veneer-plus-ABS edge solutions help combine real-wood appearance with added reinforcement for finished component edges.
Application & StorageMechanical application can use hotmelt systems. Keep edge rolls protected from UV exposure, dust, glue contamination, grease, oil, crushing, and unstable shop conditions.
Common Issues
Production Issues To Watch For.
Shinnoki problems are expensive because the face is already finished. Catching the common failure points early helps keep visible parts cleaner and more consistent.
01
▧
Visible Edge Defect
Veneer Chip-Out
Usually tied to dull tooling, poor scoring, incorrect feed and RPM balance, unsupported bottom face, or part movement.
02
◇
Finish Damage
Face Scratching
Often caused by dirty tables, debris on conveyors, careless stacking, unprotected carts, or dragging parts across the finished face.
03
△
Thermal Defect
Heat & Burnishing
Can happen when a bit rubs instead of cuts, when chips are not clearing, or when tooling is too dull for a clean veneer cut.
04
✓
Finished Detail
Edge Match Issues
Shinnoki projects should include the matching edge strategy early so the cut edge, banding, direction, and visible layout work together.
Process Demos
Shinnoki Demo Content That Supports The Shop Floor.
Short demos can show what cleaner compression cutting, proper scoring, and careful finished-panel handling look like in real production conditions.
Shinnoki Compression Bit Test
Compare edge quality on prefinished veneer using the GreenCap 1/2 inch MTCE compression bit, feed strategy, RPM, and dust extraction setup.
Scoring Blade Setup For Shinnoki
Show how scoring blade height, alignment, and tooth condition affect underside breakout on prefinished veneer panels.
Finished Panel Handling Demo
Demonstrate clean carts, stacking, part separation, offloading, inspection, and finished-face protection for Shinnoki parts.
Shinnoki Troubleshooting Request
Send Us The Shinnoki Issue. We’ll Help Protect The Finished Veneer.
Use this form when Shinnoki is chipping, scratching, burning, lifting, tearing out, banding poorly, drilling poorly, or getting damaged during handling. Because Shinnoki is already brushed, stained, and lacquered, most processing mistakes are expensive.
Veneer chip-out on the top or bottom face during CNC cutting.
Tear-out or splintering along the real wood veneer edge.
Face scratches from tables, conveyors, rollers, carts, or stacking.
Burnishing, heat marks, or glossy rubbed edges from dull tooling.
Bottom breakout from saw processing or unsupported CNC final passes.
Veneer delamination, edge lifting, or fragile edge behaviour.
Edge banding mismatch, glue-line problems, or visible edge defects.
Drilling blowout around hinge cups, shelf pins, pilots, or hardware holes.
Vacuum loss, part movement, chatter, or vibration during routing.
Handling dents, crushed corners, finish scuffs, or contaminated faces.